
Gallery Wall: 3 Different Ways!
A guy I work with said, “Hey, would love your help with doing a gallery wall going up the stairs in my house.” He’s a photographer, so really, he can customize the photos to the design. He sent me a photo with the measurements and we chatted a little bit about his style since I’ve never seen his home.
I had some quiet time over the weekend while my husband took our 3-year-old to a birthday party. (Her social life is way more interesting and jam packed than ours ever was!) So, I grabbed my laptop, a glass of Chardonnay and snuggled up on the couch on the porch. (The weather in Georgia has been beautiful lately!) I wasn’t quite sure of Mike’s (that’s my photographer friend) budget and I was getting so into designing, I decided to make him three different options: affordable, high-end and mixture of the two.
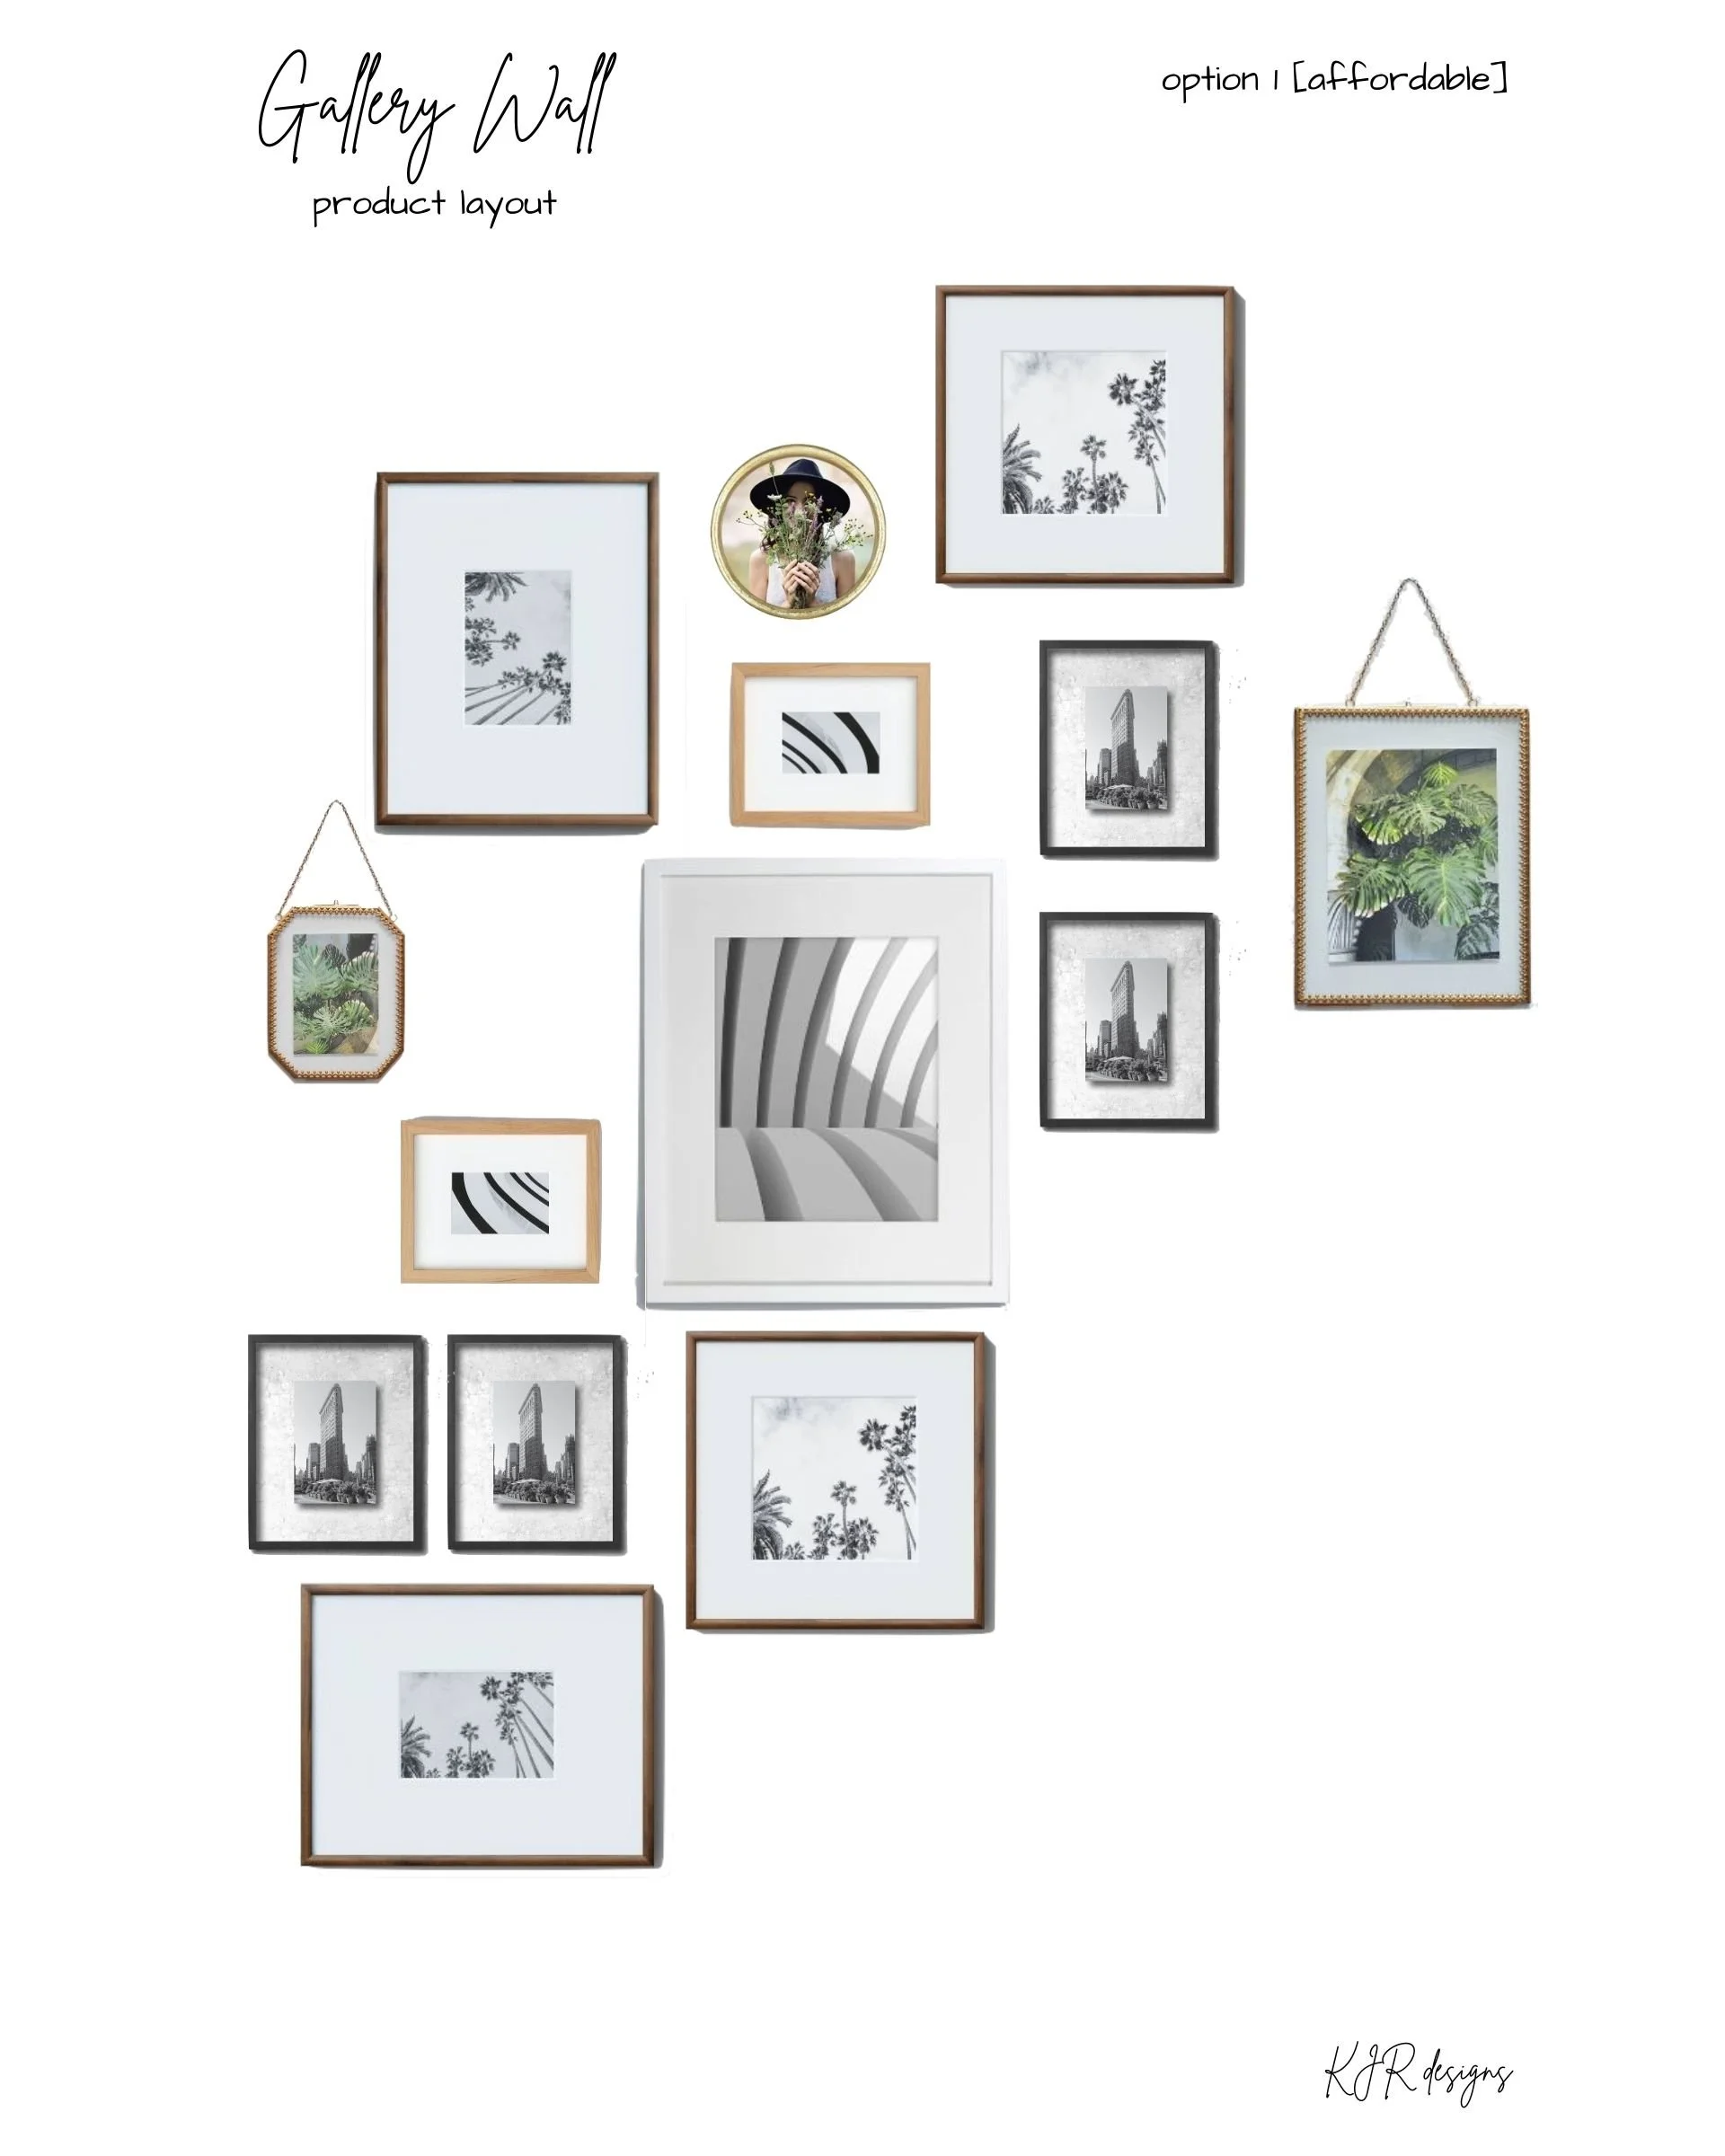


Since the photos were going on the wall over the stair’s hand rail, they were going to be at angle, so a grid would not have worked. Therefore, I decided to mix and match frame types (some wood tone, some black, some white) and I also mixed and matched photo and frame size. Doing this makes it more visually appealing.
I also wanted to be able to link all the frames I had picked so he could easily purchase them, so I just stuck with Target. I feel like they have the a good selection of frames and most of them are made very well. (And, come on, who doesn’t love Target?!)
There really is not a science to this. Just make sure to get a variety of sizes. It’s also a good idea to have some photos that are landscape and some that are portrait. You will also notice that a few of the frames I selected are square. Adding this variety will make your gallery wall more appealing. It’s also easier to make this collage-like look with different sized frames. It is nearly impossible to do this with the same sized frames. (I love grid gallery walls and is the best route to go if you want a more streamlined look or you just happen to already have a bunch of frames the same size!) But, don’t be afraid to use some of the same frames in your collage. In Option 1, I used the same black frame four times, the same square frame twice and the same wood tone frame twice just changed the orientation. In option 2, I used the same frame four times again, and in option 3, I used the square frame twice and the smaller woodbine frame three times. Duplicating a few of your frames gives it a bit of cohesiveness. If every single frame is different, it could look a little haphazard and unintentional.
My next tip, would be to keep the spacing tight and about the same width between all the frames. It’s also interesting to add a different shape. For example in Option 1 and Option 3, there are frames that hang from a chain and a round frame.
So, let’s tie all this up in a nice little bow:

Measure your space
Mike sent me a photo of the wall and gave me all the measurements. This made it so much easier to know how many frames would fit, etc.


Pick your frames
Make sure to pick a few different sizes (frame size and photo size). I also like frames that not proportionate to the photo.


Layout your design
You can do this on the floor, sketch it out on a piece of paper, or on the computer with programs such as SketchUp (what I did!)


Hang and enjoy
Make sure you measure where you want your frames to go or you can even make a template out of poster board. Put the photos you love in the frames, hang them and enjoy!
Shop the blog
Option 1 [affordable]


Option 2 [high end]


Option 3 [combo of affordable & high end]


